
: How Many People Are Actually Playing It?")


Introduction
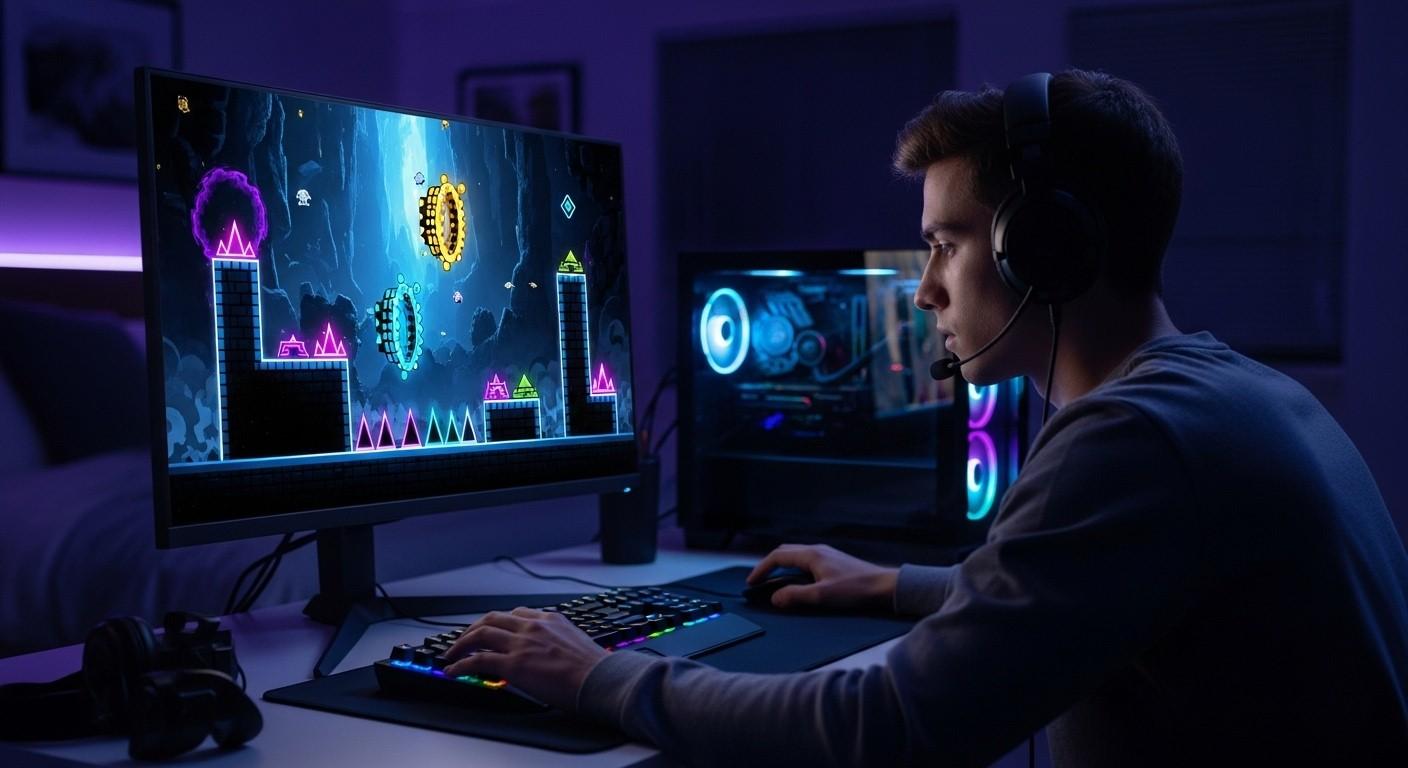
Ever played Geometry Dash and thought, “I wish I could make my own version”? Well, guess what? You absolutely can, and it’s way easier than you think!
Imagine creating a game where a little square jumps over spikes, racks up points, and restarts when it crashes. Sounds fun, right? That’s exactly what we’re building today using Scratch, a free coding platform that anyone can use.
Here’s what you’ll create in this tutorial:
- A player that jumps when you press the spacebar
- Spikes that appear randomly and move across the screen
- A scoring system that counts your points
- A “Game Over” screen when you hit an obstacle
- Your very own custom game design
The best part? You don’t need any previous coding experience. If you can click a mouse and follow simple steps, you can build this Scratch Geometry Dash game in about 20-30 minutes.
Ready to become a game creator? Let’s jump in!
What Is a Geometry Dash Scratch Game?
Let’s keep this simple. A Geometry Dash game on Scratch is a 2D platformer game where you control a shape (usually a square) that moves automatically. Your job? Press the spacebar to jump over obstacles like spikes and hurdles.
How the game works:
- Your character moves forward on its own
- Obstacles (spikes) appear from the right side
- Press spacebar to jump over them
- Hit a spike = Game Over
- Survive longer = Higher score
Think of classic games like Temple Run or Subway Surfers, but simpler. That’s your Geometry Dash Scratch tutorial in a nutshell!
Why Make This Game?
Building a Geometry Dash clone Scratch teaches you real coding skills without feeling like homework. You’ll learn:
- How games detect collisions (when things touch)
- How to make objects move and jump
- How scoring systems work
- How to create multiple copies of objects (cloning)
Plus, once you finish, you’ll have a working game you can share with friends, customize with your own ideas, and actually play for fun. Not bad for a beginner project, right?
Now, before we start coding, you’ll need to know what Scratch is and how to access it. If you’re already familiar with what Geometry Dash is, this will feel even more exciting!
Step 1: Choose Your Backdrop
First things first—every game needs a background. In Scratch, we call this a “backdrop.” Think of it as the stage where all your game action happens.
Here’s how to set it up:
- Open Scratch (go to scratch.mit.edu and click “Create”)
- Look at the bottom right corner—you’ll see a small picture icon
- Click the blue mountain icon labeled “Choose a Backdrop”
- Pick any backdrop you like, or click the paintbrush to draw your own
Pro tip: Keep your backdrop simple. A plain coloured background with a line at the bottom works perfectly. Why? Because complicated backgrounds can distract players from the actual game.
What we recommend:
- Create a solid colour backdrop (blue sky or dark background)
- Add a yellow or brown pathway at the bottom (this is where your player runs)
- Keep it clean and minimal
Why you need TWO backdrops: You’ll actually create two backdrops:
- Game Backdrop: Where the main game happens
- Game Over Backdrop: Shows “Game Over” text when you lose
To create the second backdrop, click the backdrop icon again and paint a simple “Game Over” message on a different coloured background. Don’t worry about making it fancy—even basic text works great!
Step 2: Design Your Player Sprite
Now comes the fun part—creating your player character! In Scratch, characters and objects are called “sprites.”
What’s a sprite? Think of it as any object in your game that moves or does something. Your player is a sprite. The obstacles are sprites. Even the score display uses sprites!
Creating Your Player
- Look for the blue cat icon in the bottom right (next to the backdrop icon)
- Click it and select “Paint” (the paintbrush option)
- Draw a simple square or any shape you want
Keep it simple! Your player doesn’t need to be a masterpiece. A solid-coloured square works perfectly. You can always make it fancier later.
Important settings for your player:
- Size: Make it small enough to jump over obstacles (about 30-40 pixels)
- Colour: Choose something that stands out against your backdrop
- Shape: Squares work best, but triangles or circles are fine too
Step 3: Create Your Obstacle Sprites
Your player needs something to jump over, right? That’s where spikes (obstacles) come in.
Here’s how to make them:
- Click the sprite icon again
- Choose “Paint” to create a new sprite
- Draw a triangle pointing upward (this is your spike)
- Make it about the same size as your player
Why triangles? They look like classic game spikes and clearly signal “danger” to players.
Creating Multiple Spike Costumes
Here’s a cool trick: we’ll create 3-4 different spike designs. Why? So the game can randomly choose which spike to show. This makes your game feel less repetitive!
How to add costumes:
- Click the “Costumes” tab at the top
- Right-click your spike drawing and select “Duplicate”
- Modify the duplicate slightly (change position, add more spikes, etc.)
- Repeat until you have 3-4 variations
Examples of spike variations:
- Single spike in the centre
- Two spikes side by side
- Three spikes in a row
- A tall spike and a short spike together
This variety makes your endless runner game on Scratch feel more dynamic and challenging!
Step 4: Create a Score Variable
Games aren’t fun without points! Let’s create a scoring system that counts how long you survive.
What’s a variable? Think of it as a box that stores a number. In this case, it stores your score.
Setting Up the Score
- Click “Variables” in the left menu (it’s orange)
- Click “Make a Variable”
- Name it “score” (lowercase, no spaces)
- Make sure “For all sprites” is selected
- Click OK
You’ll now see a small score counter appear on your game screen. Perfect! This will update automatically as you play.
Why variables matter: Variables are used in almost every game you’ve ever played. They track health, points, lives, time—everything! Learning this now teaches you a fundamental coding concept.
Step 5: Code Your Player to Jump
Alright, this is where the magic happens! Let’s make your player jump when you press the spacebar. This is the core mechanic of your Scratch platformer game tutorial.
The Jump Code Explained
We’ll use Scratch blocks to tell your player:
- Stay in one position at the start
- When spacebar is pressed, jump up
- Spin while jumping (looks cool!)
- Come back down
- Return to normal position
Here’s the step-by-step code:
Part 1: Set Starting Position
- Click your player sprite
- Drag these blocks from the left menu:
- when green flag clicked (Events – yellow)
- show (Looks – purple)
- point in direction 90 (Motion – blue)
- go to x: -150 y: -100 (Motion – blue)
What this does: Places your player on the left side of the screen at the bottom, facing right.
Part 2: Make the Jump Happen
- Add a forever loop (Control – orange)
- Inside it, add an if block (Control – orange)
- In the if condition, add key space pressed? (Sensing – light blue)
- Inside the if, add these blocks:
- repeat 10 (Control)
- change y by 10 (Motion)
- turn clockwise 10 degrees (Motion)
- repeat 10 (Control)
- change y by -10 (Motion)
- turn clockwise 10 degrees (Motion)
- point in direction 90 (Motion)
- repeat 10 (Control)
What this does:
- First repeat 10: Makes player jump UP whilst spinning
- Second repeat 10: Makes player fall DOWN whilst spinning
- point in direction 90: Resets rotation so player faces right again
- ]
Try it out! Click the green flag and press spacebar. Your player should jump and spin! If you’re learning how to play Geometry Dash, you’ll recognize this classic jump mechanic.
Step 6: Make Spikes Appear and Move
Now let’s bring those obstacles to life! We’ll make spikes appear on the right side of the screen and move left towards your player.
Understanding Cloning
Here’s a cool trick: instead of creating 100 spike sprites manually, we’ll use “cloning.” Think of it like a copy machine—one spike sprite creates copies of itself automatically!
Code for creating spike clones:
- Click your spike sprite
- Add these blocks:
- when green flag clicked (Events)
- set score to 0 (Variables)
- hide (Looks)
- forever (Control)
- create clone of myself (Control)
- wait 1 seconds (Control)
What this does:
- Hides the original spike (we only want to see the clones)
- Creates a new spike clone every 1 second
- Resets score to 0 when game starts
Making Clones Move
Now let’s tell each spike clone what to do:
- Still on the spike sprite, add a new code stack:
- when I start as a clone (Control)
- show (Looks)
- go to x: 240 y: -100 (Motion)
- switch costume to pick random 1 to 4 (Looks + Operators)
- glide 3 secs to x: -240 y: -100 (Motion)
- delete this clone (Control)
What this does:
- Shows the clone spike
- Places it on the right edge (x: 240)
- Randomly picks one of your spike costumes
- Slides smoothly across the screen in 3 seconds
- Deletes itself when it reaches the left edge
Test it! Click the green flag. You should see spikes appearing from the right and moving left. Adjust the wait time if spikes appear too fast or slow!
Step 7: Add the Scoring System
Time to make your game track points! The longer you survive, the higher your score.
How scoring works: As long as your player hasn’t touched a spike, the score keeps increasing.
Code the Score Counter
- Click your spike sprite (yes, the spike sprite, not the player)
- Add this code stack:
- when green flag clicked (Events)
- forever (Control)
- repeat until touching player? (Control + Sensing)
- change score by 1 (Variables)
- repeat until touching player? (Control + Sensing)
What this does:
- Continuously adds 1 point to the score
- Stops adding points when a spike touches the player
- The repeat until block is the key—it keeps the score going until collision happens
Why on the spike sprite? Because the spike needs to check if it’s touching the player. It makes the code cleaner and easier to manage.
Pro tip: Want slower scoring? Add a wait 0.1 seconds block inside the repeat loop. This makes points increase more gradually.
Step 8: Create the Game Over Condition
What happens when your player hits a spike? The game should stop and show “Game Over!” Let’s code that now.
Detecting Collisions
- Click your player sprite
- Add this code stack:
- when green flag clicked (Events)
- forever (Control)
- if touching spike? (Control + Sensing)
- switch backdrop to Game Over (Looks)
- stop all (Control)
- if touching spike? (Control + Sensing)
What this does:
- Constantly checks if the player touches any spike
- When collision detected, switches to your Game Over backdrop
- Stops all code from running (freezes the game)
Understanding Geometry Dash controls helps you appreciate how collision detection works in rhythm-based games!
Step 9: Hide Sprites When Game Ends
One final touch—let’s make the player disappear when the game ends. This looks more professional!
The Final Code Block
- Still on your player sprite, add:
- when backdrop switches to Game Over (Events)
- hide (Looks)
- Optionally: play sound pop until done (Sound)
What this does:
- Waits for the Game Over backdrop to appear
- Hides the player sprite
- Plays a sound effect (if you added one)
Congratulations! You’ve just built a complete Geometry Dash game on Scratch!
Common Problems and How to Fix Them
Even experienced coders run into bugs. Here are the most common issues when making a Geometry Dash Scratch game and their simple fixes.
Problem 1: Player Doesn’t Jump Smoothly
Symptoms: Player jumps too high, too low, or rotation looks weird.
Solutions:
- Check the change y by values in your jump code (should be 10 and -10)
- Make sure both repeat 10 blocks are there
- Verify the turn clockwise 10 degrees blocks are inside the repeats
- Add a point in direction 90 block after the second repeat
Problem 2: Spikes Don’t Appear
Symptoms: No obstacles show up on screen.
Solutions:
- Make sure the original spike has the hide block (only clones should show)
- Check that create clone of myself is inside a forever loop
- Verify the clone code starts with when I start as a clone
- Test if your spike sprite is selected when running the code
Problem 3: Score Doesn’t Increase
Symptoms: Score stays at 0 the whole game.
Solutions:
- Confirm the set score to 0 block runs when green flag clicked
- Check that change score by 1 is inside the repeat until block
- Make sure the sensing block says touching player? not something else
- Try clicking the score variable checkbox in the Variables menu to make it visible
Problem 4: Game Doesn’t End on Collision
Symptoms: Player goes through spikes without game over.
Solutions:
- Verify the player sprite has the collision detection code
- Check the sensing block says touching spike? (must match spike sprite name exactly)
- Make sure stop all block is included after switching backdrops
- Test if your spike sprite name matches what’s in the sensing block
Problem 5: Spikes Move Too Fast or Slow
Symptoms: Game is too hard or too easy.
Solutions:
- Adjust the glide _ secs number in spike clone code (higher = slower)
- Change the wait _ seconds in spike creation loop (higher = fewer spikes)
- Modify change y by values in player jump for different jump heights
Still stuck? Check that each sprite has the correct code. Player sprite should have jump and collision code. Spike sprite should have cloning and movement code.
Ways to Customize Your Geometry Dash Clone
Ready to make your game unique? Here are fun ideas to level up your Scratch Geometry Dash game!
Easy Customizations (Beginner-Friendly)
1. Change Player Appearance
- Draw different shapes (triangle, circle, star)
- Add colours and patterns
- Create multiple costumes that switch during gameplay
2. Design New Obstacles
- Create different spike sizes
- Add moving platforms
- Include flying obstacles at different heights
3. Modify Game Speed
- Slow down spikes for easier gameplay: increase glide time to 4-5 seconds
- Speed up for expert mode: decrease glide time to 1-2 seconds
- Adjust wait time between spike creation
4. Add Sound Effects
- Jump sound when spacebar pressed
- Crash sound on collision
- Background music during gameplay
- Victory sound (if you add a win condition)
5. Create Custom Backdrops
- Space theme with stars
- Underground cave with crystals
- City skyline at sunset
- Your own original artwork
Intermediate Customizations
6. Multiple Difficulty Levels
- Create buttons for Easy/Medium/Hard modes
- Each mode changes spike speed and frequency
- Add level selection screen
7. Power-Ups
- Create a shield sprite that makes you invincible for 3 seconds
- Add a slow-motion power-up
- Include a double-jump ability
8. High Score System
- Create a “Best Score” variable
- Save highest score achieved
- Display it on the Game Over screen
9. Different Obstacle Types
- Add blocks that require ducking
- Create moving platforms to land on
- Include bouncing obstacles
10. Lives System
- Give player 3 lives instead of instant game over
- Create heart sprites that disappear when hit
- Reset to checkpoint instead of full restart
Advanced Customizations
11. Multiple Levels
- Create 3-5 different levels with unique backgrounds
- Increase difficulty each level
- Add a “Level Complete” screen between levels
12. Collectible Coins
- Add coin sprites that appear randomly
- Collecting coins adds bonus points
- Create a separate coin counter
13. Character Selection
- Design 3-4 different player characters
- Let players choose before game starts
- Each character could have unique abilities
14. Moving Background
- Make the backdrop scroll to create movement illusion
- Add parallax effect (background moves slower than foreground)
- Creates more dynamic gameplay feel
15. Endless Mode vs. Level Mode
- Switch between different Geometry Dash game modes
- Endless: survives as long as possible
- Level Mode: reach specific distance to win
Pro tip: Start with one or two customizations. Test thoroughly before adding more. Too many changes at once make debugging difficult!
Frequently Asked Questions
How long does it take to make a Geometry Dash game on Scratch?
For beginners following this tutorial, expect 20-30 minutes to build the basic version. If you’re adding customizations like sound effects, multiple levels, or power-ups, it could take 1-2 hours total. The good news? You can save your progress and return anytime!
Can I make Geometry Dash on Scratch without coding experience?
Absolutely! That’s the beauty of Scratch—it uses visual blocks instead of typing code. If you can drag and drop, you can build this game. This Scratch game development tutorial is designed specifically for complete beginners with zero programming background.
How do I make my Geometry Dash Scratch game harder or easier?
Adjust these three settings:
- Spike speed: Change the glide _ secs number (lower = faster/harder)
- Spike frequency: Modify wait _ seconds in creation loop (lower = more spikes/harder)
- Jump height: Alter change y by values (lower = shorter jump/harder)
Can I add multiple levels to my Scratch Geometry Dash game?
Yes! Create additional backdrops for each level. Use a variable called “level” to track progress. When the score reaches certain numbers (like 50, 100, 150), switch to the next backdrop and increase difficulty by adjusting spike speed.
Why do my spikes overlap or appear too quickly?
This happens when the wait time between clone creation is too short. Increase the wait 1 seconds block to wait 1.5 seconds or wait 2 seconds. This gives more space between obstacles.
How do I share my Scratch Geometry Dash game with friends?
Click the orange “Share” button at the top of Scratch. This creates a public link you can send to anyone. They can play your game, leave comments, and even remix it (make their own version). Make sure you’re signed in to save and share projects!
What’s the difference between a sprite and a backdrop in Scratch?
- Backdrop: The non-moving background image (like your game world)
- Sprite: Any object that moves or performs actions (like your player, spikes, coins)
Think of backdrops as the stage and sprites as the actors!
Can I make this game on mobile or tablet?
Scratch works best on computers with keyboard and mouse. However, you can play finished Scratch games on mobile devices. For creating games, use a laptop or desktop computer for the best experience.
How do I add sound effects to my game?
- Click the “Sounds” tab at the top
- Click “Choose a Sound” (speaker icon)
- Browse Scratch’s sound library or upload your own
- Use the play sound _ until done block in your code
- Place it where you want sounds (jump, collision, game over)
Why doesn’t my player jump when I press spacebar?
Check these common mistakes:
- Make sure key space pressed? block is inside an if condition
- Verify the if block is inside a forever loop
- Check that the jump code is on the player sprite, not the spike sprite
- Ensure your player sprite is selected when adding the code
Conclusion
Congratulations on building your very own Geometry Dash game on Scratch! You’ve just transformed from a player into a game creator—and that’s something to be proud of.
What you achieved today:
- Created a fully functional platformer game from scratch
- Learned essential programming concepts (variables, loops, conditionals, collision detection)
- Designed custom sprites and backdrops
- Implemented game mechanics like jumping, scoring, and game over conditions
- Built something you can actually play and share with others
But here’s the exciting part: this is just the beginning! The game you built today is a foundation. You can now customize it endlessly—add levels, power-ups, new obstacles, sound effects, and make it completely your own unique creation.
What’s next for you?
- Experiment with the customization ideas we shared
- Browse other Scratch projects for inspiration
- Challenge yourself to add one new feature each week
- Share your game with friends and get feedback
Remember, every professional game developer started exactly where you are now—with simple projects that taught them fundamental skills. You’re not just learning to code; you’re learning to think like a creator, solve problems, and bring ideas to life.
The Scratch Geometry Dash game you built today uses the same logic and programming concepts found in professional games. The only difference? Scale and complexity. But the foundation? You’ve got it mastered.
So keep creating, keep experimenting, and most importantly—keep having fun! Your next game could be even more amazing than this one.Ready to level up your Scratch skills? Start customizing your game right now, or explore more advanced Scratch coding Geometry Dash tutorials. The only limit is your imagination!